1st phorm

1st phorm is a high-quality recipes brand for weight loss like healthy recipes, dinner, dessert, and lunch ideas

LUNCH

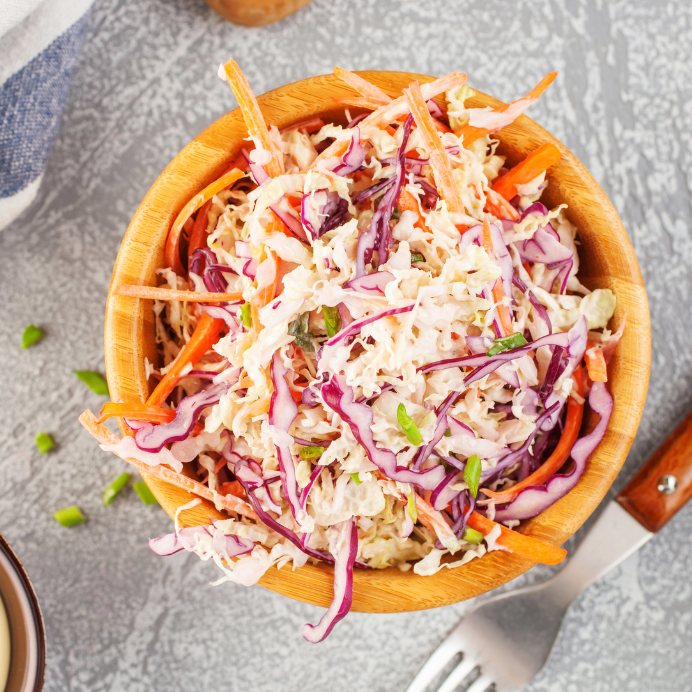
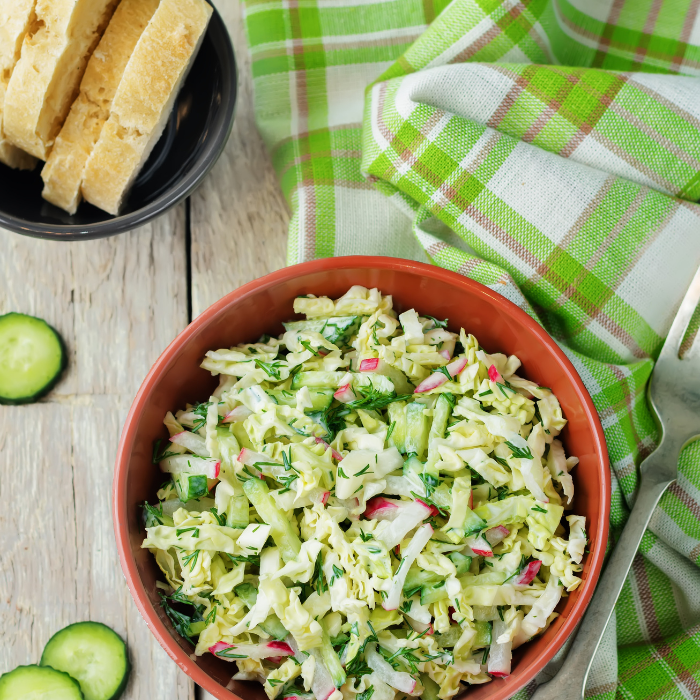
coleslaw with pineapple

Paleo-Friendly Pineapple Coleslaw + BBQ Sides

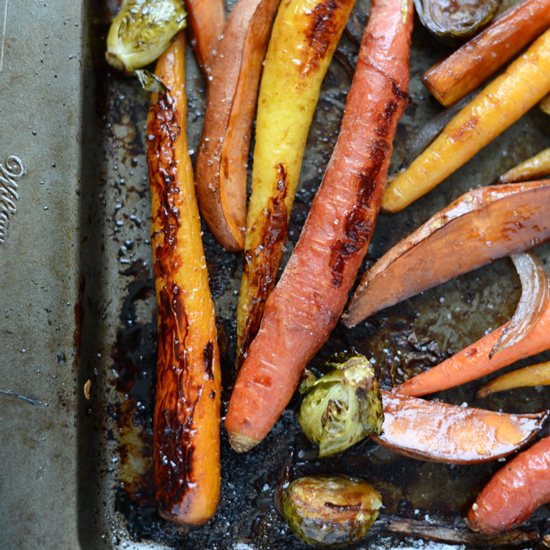
sweet roasted vegetables

Honey Balsamic Roasted Veggies

yogurt dill salad dressing

Easy Salmon Salad with Greek Yogurt Dill Dressing

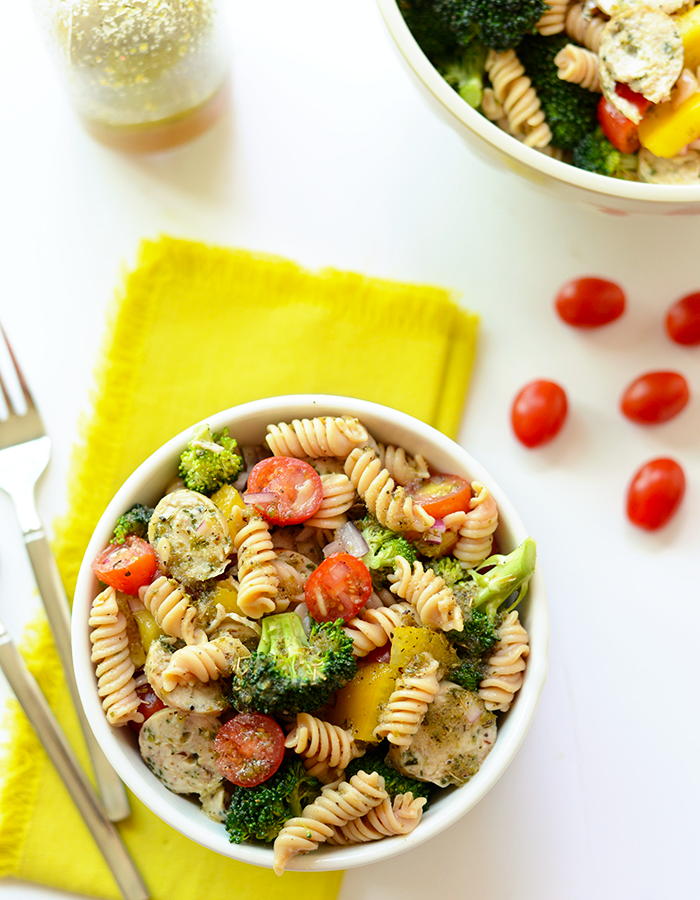
Quinoa Pasta Salad with Chicken Sausage

Quinoa Pasta Salad with Chicken Sausage

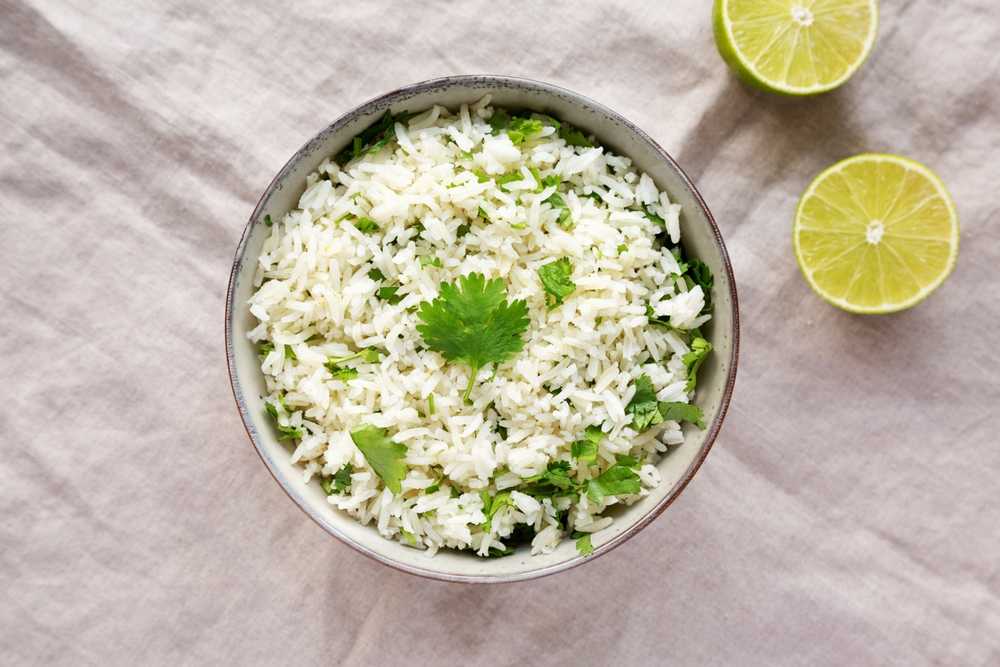
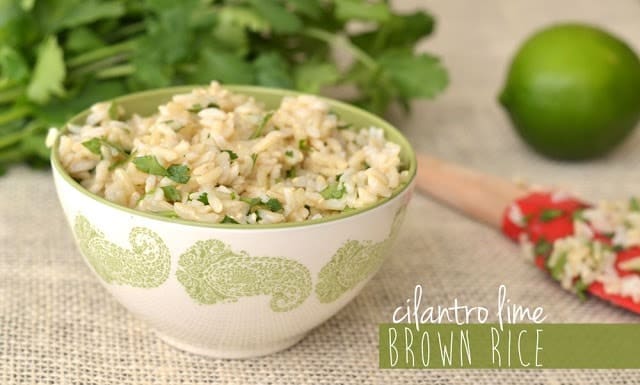
chipotle brown rice recipe

Copy Cat: Cilantro Lime Brown Rice

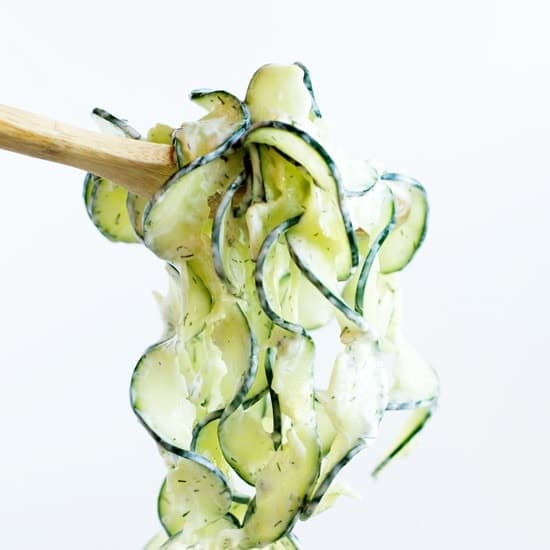
Spiralized Tzatziki Cucumber Salad

Spiralized Tzatziki Cucumber Salad

See More;

Healthy dinner

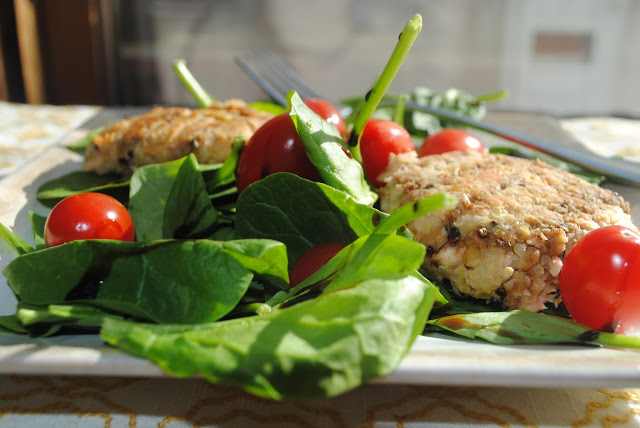
Salmon Bean Burgers

SALMON BEAN BURGERS

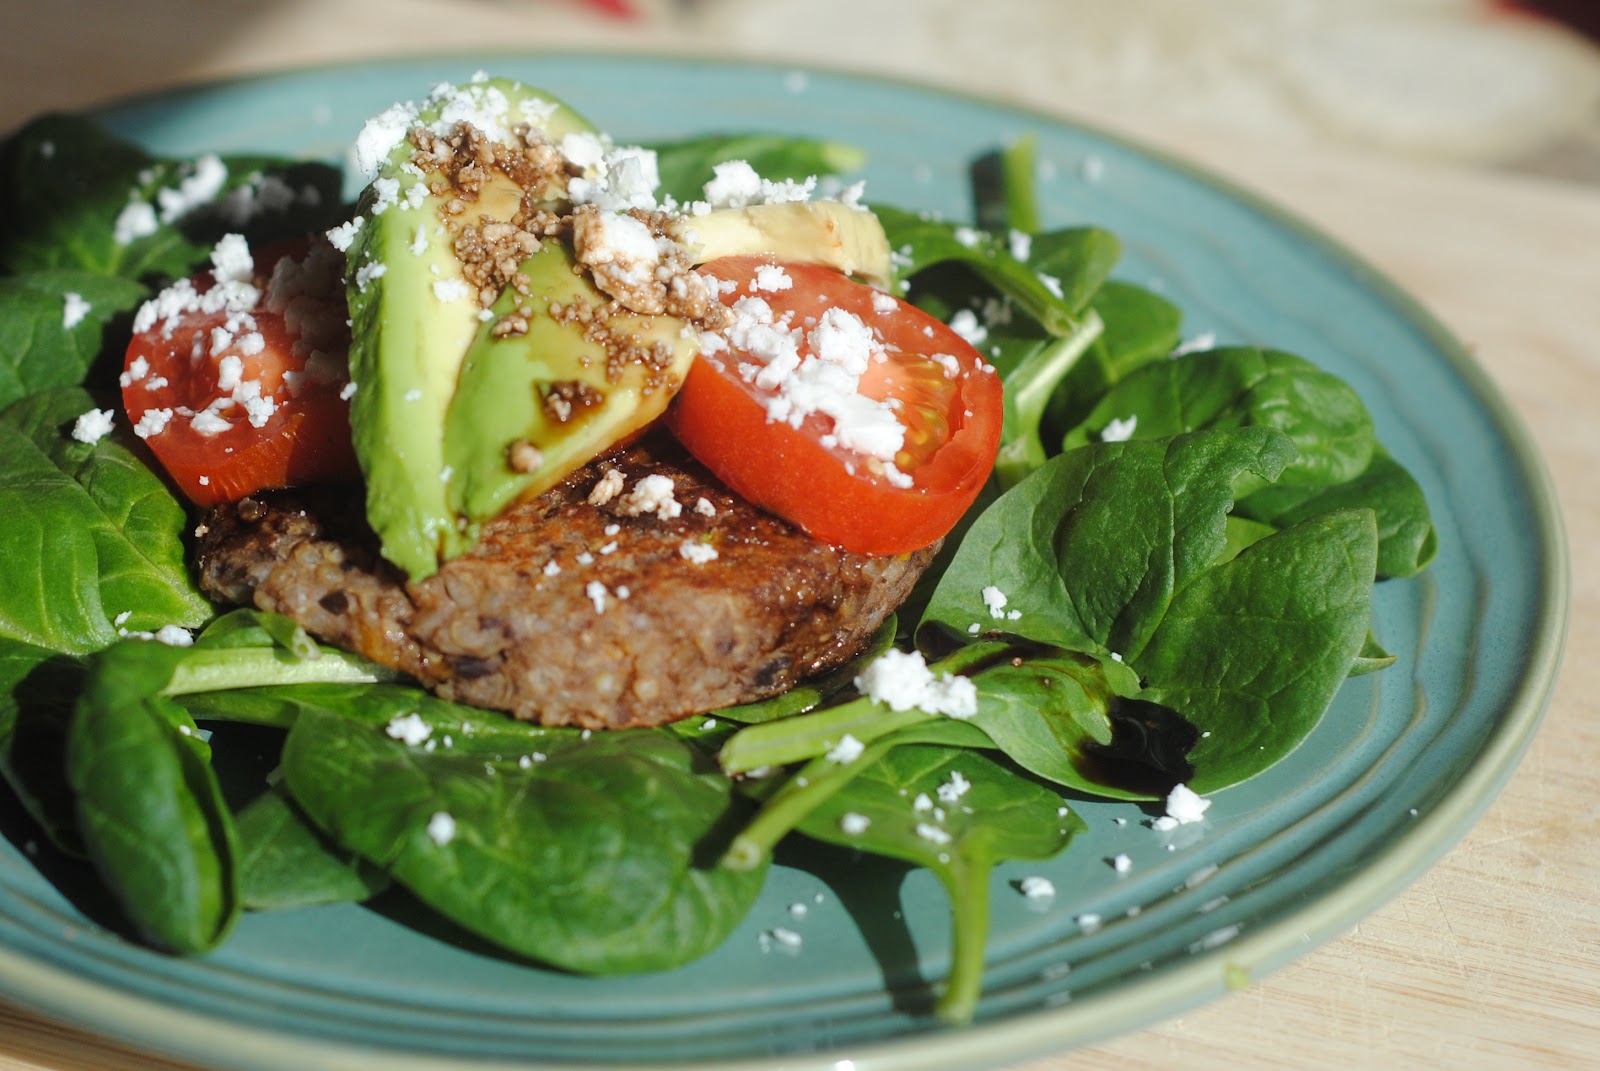
Black Bean Quinoa Veggie Burgers

Black Bean Quinoa Veggie Burgers

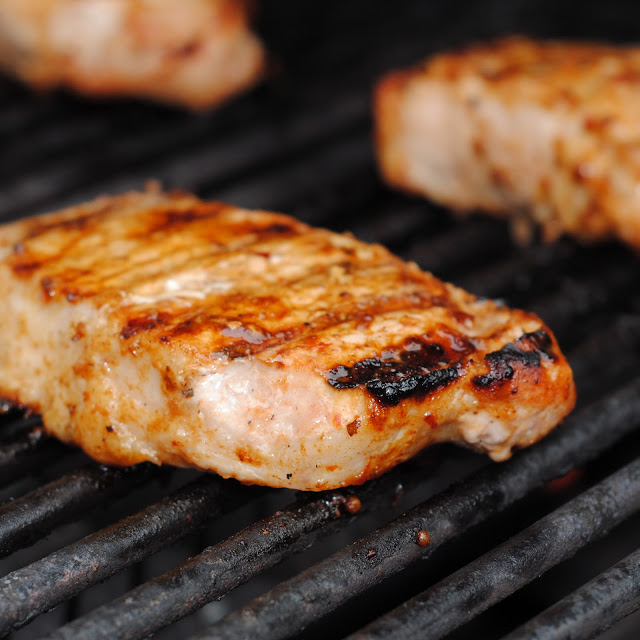
Lemon Grass, Ginger, Soy Pork Chops

Lemon Grass Ginger Soy Pork Chops

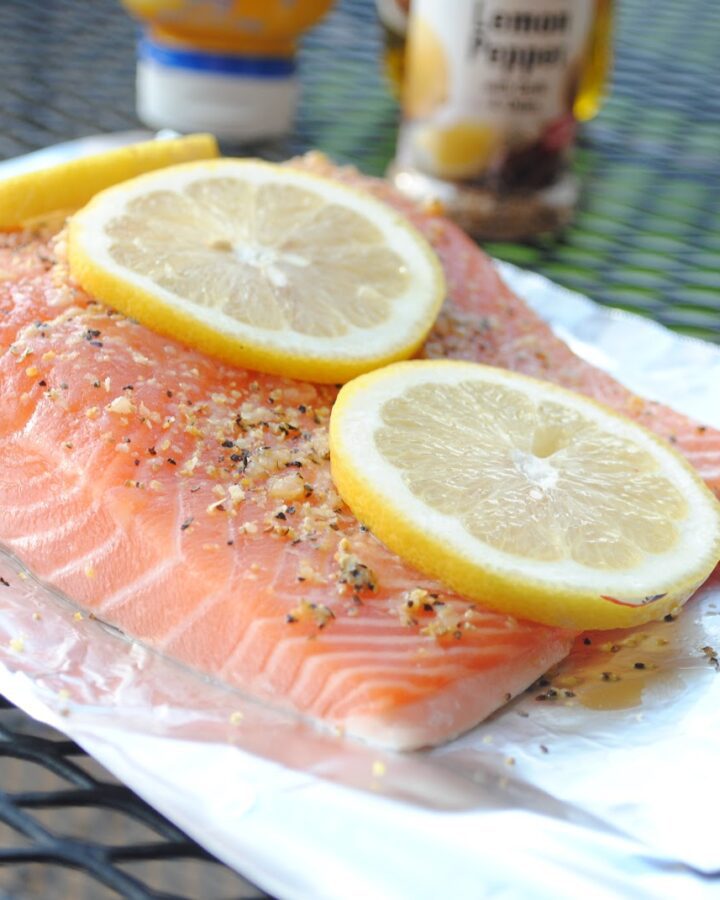
lemon pepper salmon

lemon pepper salmon

Shrimp Stir Fry + BUTI

Shrimp Stir Fry + BUTI

homemade beef w/ broccoli & [brown] fried rice

homemade beef broccoli fried rice

See More;

  • Home
  • Contact
  • Healthy snacks
  • Recipe
  • Healthy lunch
  • Healthy dessert
  • Breakfast oats
  • Home
  • Privacy Policy
  • About us

roast poblano peppers

May 10, 2024 by Lee Hersh Leave a Comment

How to roast poblano peppers

Unleash the flavor of peppers and chilies by learning how to roast them in the oven or on a gas burner. Use this method for bell peppers, poblanos, anaheims, pasillas, and more!

The seemingly endless varieties of peppers come with just as many roasting methods, all leading to a world of delicious possibilities!
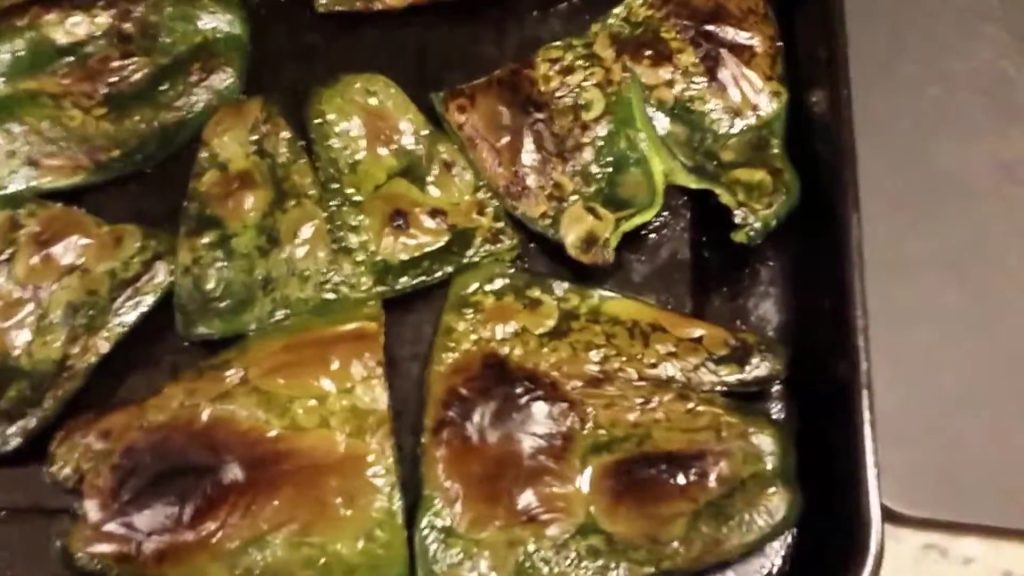
While I believe the oven broiler method shines, this recipe offers three ways to roast peppers: oven/broiler, oven/roasting, and open flame, giving you options to find your perfect match!

See video

For perfectly roasted peppers or chilies, begin with clean, dry ingredients (see the recipe below for specifics!), then follow this handy overview.

1.To roast the peppers under the oven broiler, broiling them until the tops are blackened and blistered for about 5 minutes.
2.To roast peppers in the oven, bake them at 500 degrees Fahrenheit for 30-40 minutes, turning occasionally until the skins blacken and blister for even cooking.
3.For open flame roasting, char chilies directly over a gas flame, using tongs to turn them frequently until blackened and blistered on all sides.
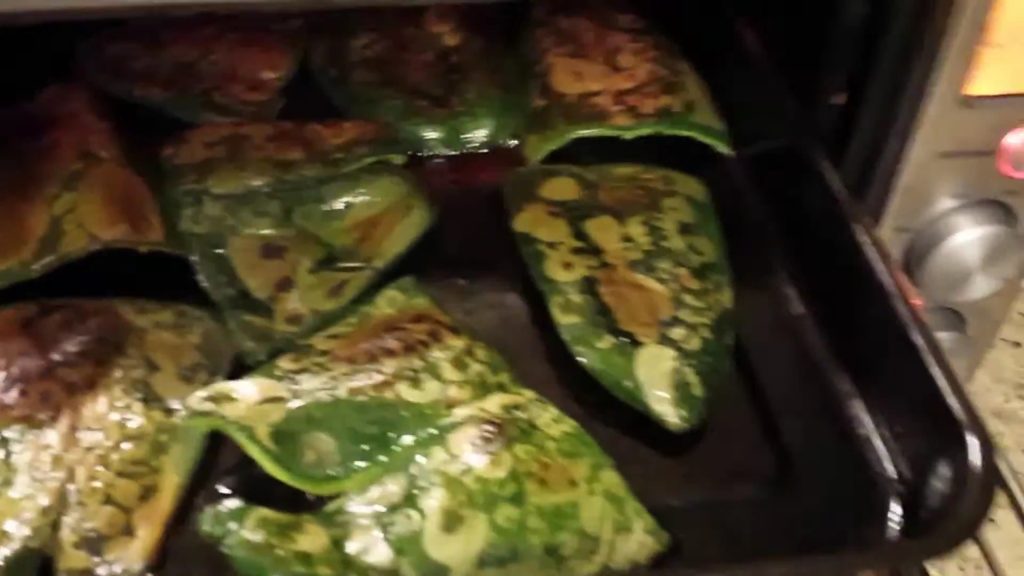
roast poblano peppers

After the peppers cool enough to handle, slip on gloves (trust me!) and rub off the skins; if some resist, grab dry paper towels to finish the job.

Whether you keep the stems on depends on your final use for the roasted peppers.

Store leftover roasted peppers covered in the refrigerator for up to a week, enjoying them in sandwiches, soups, salads, or salsa, or get creative by stuffing them with cheese and giving them a tempura-style makeover as Chile Relleno – yum!
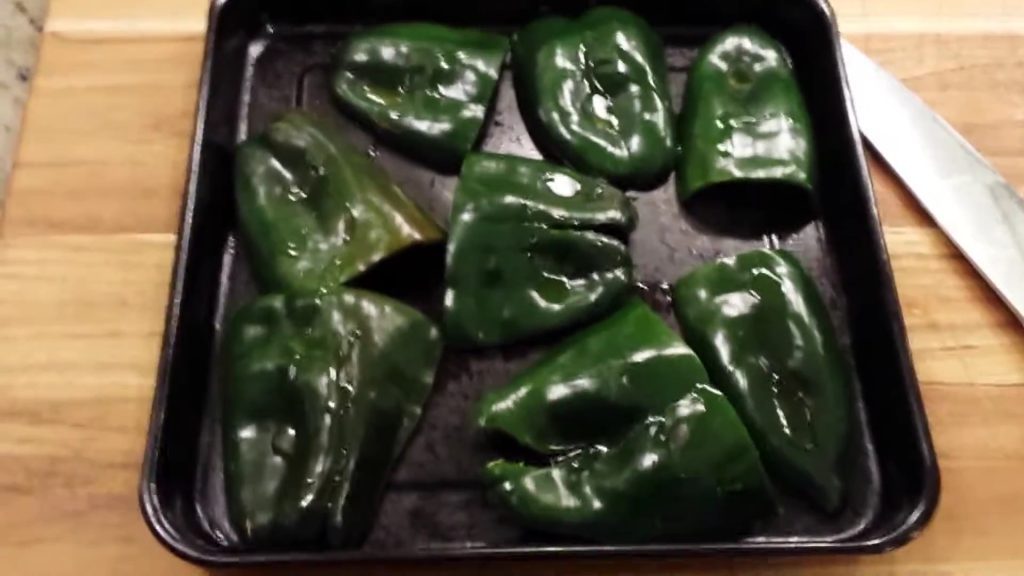
roast poblano peppers

The  Roasted Chili-Corn Salsa at Chipotle also uses roasted poblano peppers. This adds a bit of spice without overdoing it, ratcheting the salsa up to “medium heat.”

See more healthy recipes

Print
clock clock iconcutlery cutlery iconflag flag iconfolder folder iconinstagram instagram iconpinterest pinterest iconfacebook facebook iconprint print iconsquares squares iconheart heart iconheart solid heart solid icon
roast poblano peppers

roast poblano peppers


  • Author: Lee Hersh
  • Total Time: 30 minutes
Print Recipe
Save Recipe Recipe Saved

Instructions

  1. To roast the peppers under the oven broiler, arrange an oven rack 6 inches from the broiler and preheat on HIGH. Then, broil the peppers, turning every few minutes, until the tops are blackened and blistered but not ash white, about 5 minutes in total.
  2. For easy cleanup, line a baking sheet with aluminum foil and preheat your oven to 500 degrees. Roast the whole peppers in a single layer on the prepared sheet, turning them occasionally for even browning, until the skins are blackened and blistered but not ash white, which takes about 30 to 40 minutes.
  3. For smoky roasted peppers, turn a gas burner to HIGH and char the peppers directly over the flame using tongs to turn them occasionally until blackened and blistered, but not ashy.
  4. Transfer the peppers to a bowl, cover tightly with plastic wrap, and let them stand for about 20 minutes, until cool enough to handle.
  5. For stuffing, carefully rub off and discard the blackened skin, leaving the stem intact (gloves recommended).
  6. For chopping the peppers, remove and discard the stem and seeds, then cut them into quarters lengthwise and chop.
  • Cook Time: 30 minutes
  • Category: Side Dish
  • Cuisine: American

Nutrition

  • Serving Size: 4 servings
  • Calories: 74 kcal

Did you make this recipe?

Share a photo and tag us — we can’t wait to see what you’ve made!

Filed Under: Recipe Tagged With: How to roast poblano peppers

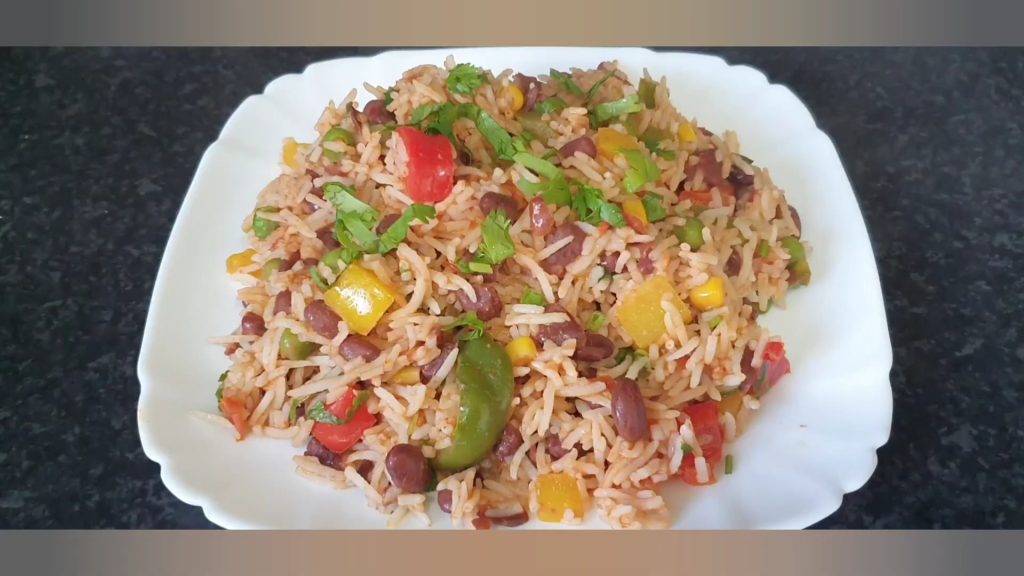
Mexican Rice (Restaurant style Arroz Rojo)

May 10, 2024 by Lee Hersh Leave a Comment

Mexican Rice (Restaurant style Arroz Rojo)

Unlock the secret to restaurant-worthy Mexican Rice at home, fluffy and flavorful, never sticky, for a perfect side dish every time! Whip up this family-friendly or crowd-pleasing Mexican Rice recipe that delivers consistent flavor and perfect texture, even with brown rice!

Mexican Rice shines alongside carne asada, enchiladas, fajitas, or tacos, but it can also be a hearty meal on its own with beans and guacamole. Brown rice lovers, rejoice – this recipe is perfect for meal prepping too!

Throwing a fiesta? Easily scale this Mexican Rice recipe by adjusting the ‘servings’ on the recipe card – the recipe does the math for you!

What is Mexican Rice made of?

Mexican Rice features fluffy long-grain white rice seasoned with tomatoes, onions, jalapeños, and a rich broth made with chicken broth and tomato paste.

While fluffy long-grain white rice is traditional, this recipe also works with brown rice, and for a vegetarian or vegan twist, simply swap the chicken broth for vegetable broth or water.

How do you make the Best Mexican Rice?

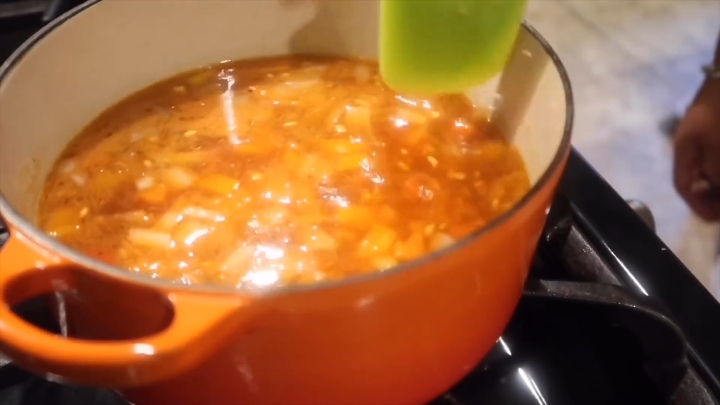
For the most flavorful Mexican Rice, take a tip from Cook’s Illustrated (and traditional Arroz Rojo!), and start by blitzing fresh tomatoes and onions into a vibrant puree that infuses every grain of rice.

Next, saute the rice in vegetable oil until toasted and golden (no food processor needed? Mine’s been going strong since 2003!), then stir in garlic and jalapeños (optional, they lose their heat during cooking).

Finally, incorporate your vibrant tomato-onion puree, chicken broth, and tomato paste into the sauteed rice.

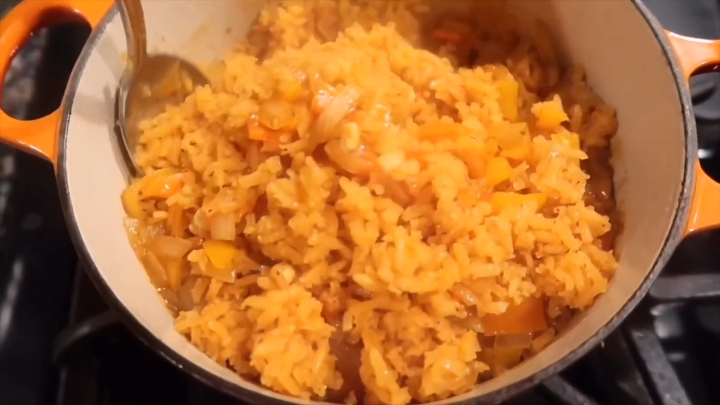
Bake the rice in the oven for just 30 minutes, then fluff with a fork for fool-proof, soft, and individual grains.

See video

What is the proper ratio of rice to liquid?

For every one 1 cup of rice, use 1 ¾ cups liquid of choice and ½ teaspoon salt.

Can I make Mexican Rice without oil?

Yes, you can omit the oil entirely in this recipe if you want to.

For Step 3, ditch the oil! Toast the dry, unrinsed rice on high heat, stirring constantly, until half the grains are lightly browned, then follow the recipe as written.

Despite toasting the rice dry (keep stirring to avoid scorching!), the recipe continues as written, adding garlic and jalapeños for perfectly separated and fluffy rice, just like the oil-version.

Can I use brown rice?

Absolutely, brown rice makes a fantastic substitute for white rice in Mexican rice, boosting its nutritional value. Just remember that brown rice takes longer to cook, typically 35-40 minutes, so extend the cooking time by 10 minutes for perfectly cooked brown rice.

Brown rice swaps seamlessly into this recipe for a nutritional boost – simply use the “brown rice” setting on your rice cooker, which typically cooks it in 50-55 minutes.

mexican rice(restaurant style)

How do you reheat the rice?

To reheat leftover Mexican rice, add a touch of water, cover with aluminum foil, and bake in a 300-degree oven for 20 minutes, or until warmed through.

For single servings, microwave leftover Mexican rice in a splash of water, covered by a damp paper towel, in 1-minute bursts until warm.

Mexican Rice in a Rice Cooker

Responding to a reader’s request, I successfully made this Mexican Rice recipe in a rice cooker – follow the written recipe through Step 4 for perfect results!

Once the rice boils, simply transfer it to your pre-sprayed rice cooker, close the lid, and cook according to the manufacturer’s instructions.

My rice cooker cooked it in 33 minutes (similar to the oven time) with zero stirring required – considering a rice cooker? This one is a favorite in my family (including me and two sisters)!

Make Arroz Rojo For a Crowd

Basmati rice also shines in this recipe, proving successful with both the original oven-baked method and the rice cooker technique (pictured above)!

Scaling up this recipe for 25 adults is easy: simply triple the ingredients listed below, bake for an additional 10 minutes (40 minutes total), and use an 8-quart stock pot – thanks to reader Andy for the question!

While I recommended tripling the recipe, my blender maxed out at 11 roma tomatoes and 2 large onions, yielding 6 cups of tomato-onion puree – remember, veggie size can affect yield!

See more healthy recipes

Print
clock clock iconcutlery cutlery iconflag flag iconfolder folder iconinstagram instagram iconpinterest pinterest iconfacebook facebook iconprint print iconsquares squares iconheart heart iconheart solid heart solid icon

Restaurant style Mexican Rice Recipe (Arroz Rojo)


  • Author: Lee Hersh
  • Total Time: 55 minutes
Print Recipe
Save Recipe Recipe Saved

Description

Unlock the secret to restaurant-worthy Mexican Rice at home, fluffy and flavorful, never sticky, for a perfect side dish every time! Whip up this family-friendly or crowd-pleasing Mexican Rice recipe that delivers consistent flavor and perfect texture, even with brown rice!


Ingredients

Scale
  • 2 medium vine-ripened tomatoes or 4 Roma tomatoes cored and quartered
  • 1 onion peeled and quartered
  • 1/3 cup vegetable oil
  • 2 cups long-grain or basmati white rice
  • 4 cloves garlic minced
  • 1 to 2 jalapeno peppers ,stemmed, seeded, and minced (optional)
  • 2 cups low-sodium chicken broth (see notes)
  • 1 tablespoon tomato paste
  • Salt and freshly ground black pepper
  • ½ cup fresh cilantro or parsley minced
  • Lime or lemon wedges for serving

Instructions

  1. For even cooking, preheat your oven to 350°F and adjust an oven rack to the middle position.
  2. In a food processor or blender, puree the tomatoes and onions until smooth, then measure out 2 cups of the puree, discarding any excess.
  3. Heat the oil in a large Dutch oven or 3-quart saucepan until shimmering (see notes), then add the rice and sauté, stirring frequently, until light golden in color, about 10 to 15 minutes.
  4. Add garlic and jalapeños (if using), and stir until fragrant, about 15 seconds; then stir in the tomato mixture, broth, tomato paste, and 1 ½ tsp. salt, and bring to a boil.
  5. Cover and bake for about 30 minutes, stirring halfway through, until the rice is tender and the liquid is absorbed.
  6. Fluff the rice with a fork, then fold in cilantro or parsley, season to taste with salt and pepper, and serve with lime or lemon wedges.

Notes

  1. While long-grain white rice is traditional, I’ve also tested this recipe successfully with basmati rice.
  2. For a vegetarian option, simply substitute vegetable broth for the chicken broth.
  3. If toasting the rice in a 3-quart saucepan, transfer it to a larger (at least 4-quart) oven-proof baking dish for baking.
  4. For the rice cooker method, follow the recipe through Step 4, then transfer the boiling rice mixture to a non-stick sprayed rice cooker, close the lid, and cook according to manufacturer instructions. Mine takes 33 minutes on the “White Rice” setting.
  5. To scale this recipe for 25 adults, triple all ingredients, use an 8-quart stock pot, and bake for an additional 10 minutes (40 minutes total).
  • Prep Time: 5 minutes
  • Cook Time: 50 minutes
  • Category: Side Dish
  • Cuisine: Mexican

Nutrition

  • Serving Size: 8 servings
  • Calories: 282 kcal

Keywords: rice, tomatoes

Did you make this recipe?

Share a photo and tag us — we can’t wait to see what you’ve made!

Filed Under: Recipe Tagged With: Mexican Rice

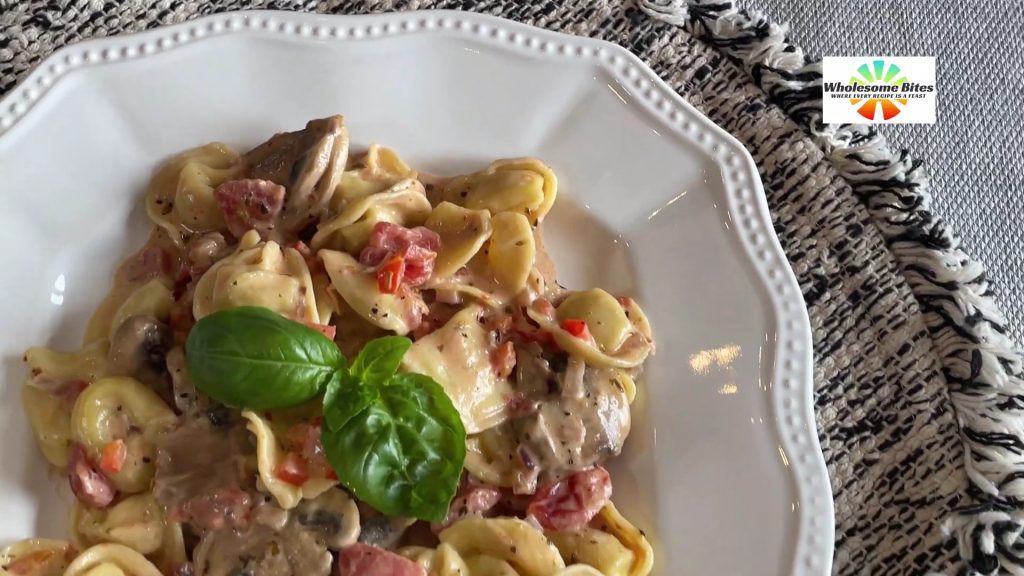
cheese tortellini in garlic basil sauce

May 9, 2024 by Lee Hersh Leave a Comment

cheese tortellini in garlic basil sauce

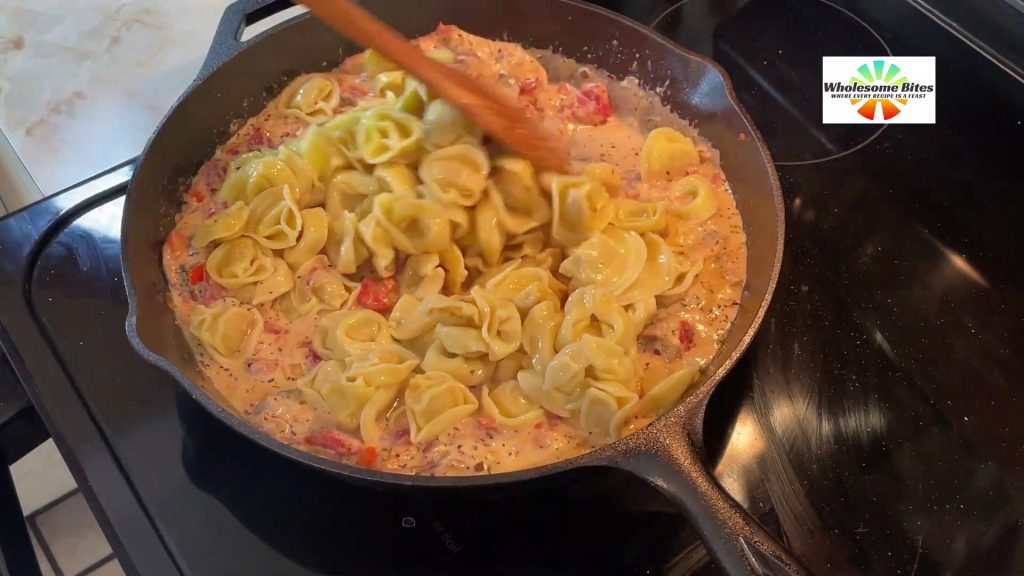
Whip up this easy and delicious Cheese Tortellini in garlic butter sauce in 15 minutes or less, perfect as a hot party appetizer or comforting weeknight meal (double the batch, it’ll disappear fast!), using refrigerated or frozen cheese tortellini for ultimate convenience.

cheese tortellini in garlic basil sauce

HOW DO YOU COOK CHEESE TORTELLINI?

1.Bring 4 quarts of water (or broth) to a boil for each pound of tortellini. Add salt if desired; I like 1 tablespoon salt if I’m using water, but not if I’m using broth.

Watch video

https://youtu.be/Mfe6uGJQ-PE?si=5JWAljs2Ls2ZaXQ3

2.Add tortellini and cook until they float to the surface and reach an internal temperature of 160 degrees Fahrenheit.

  • 2 to 3 minutes for refrigerated tortellini
  • 3 to 5 minutes for frozen tortellini
  • 10 to 11 minutes for dried tortellini

3.Gently drain the tortellini and either follow the remaining recipe steps or serve immediately.

While I usually use low-sodium chicken broth and unsalted butter, this recipe fell a bit flat when I tested it with those ingredients.

In this case, I don’t recommend the low-sodium options, but if that’s what you have, feel free to add a little salt to the finished dish until it tastes perfect.

cheese tortellini in garlic basil sauce

WHAT IS THE DIFFERENCE BETWEEN A TORTELLINI AND A TORTELLONI?

Though sharing the same basic shape, tortellini are daintier at around 2 grams each, while tortelloni boast a larger size, typically weighing in at 5 grams.

While cheese and vegetable fillings reign supreme for both tortellini and tortelloni, tortellini can also boast a savory meat filling, which is less common for tortelloni.

Tortellini, because of their small size, could easily be served in a soup or other broth-based dish. Tortelloni, however, are typically served only in a sauce.

cheese tortellini in garlic basil sauce

CAN YOU COOK TORTELLINI FROM FROZEN?

Yes,For each pound of tortellini, simply bring 4 quarts of water with 1 tablespoon of salt to a boil, add the unthawed tortellini and cook until they float (usually 3-5 minutes), ensuring they reach an internal temperature of 165 degrees Fahrenheit in the coldest spot.

WHAT IS THE MAIN DIFFERENCE BETWEEN RAVIOLI AND TORTELLINI?

While ravioli come in both square and circular shapes, they’re all formed by encasing a filling between two pressed sheets of dough.

Unlike ravioli’s two-sheet construction, tortellini resemble dumplings with a hat-shaped dough wrapping.

HOW LONG CAN YOU KEEP COOKED CHEESE TORTELLINI?

Like most cooked pasta, this recipe is best enjoyed within 3-4 days in the fridge (and the leftovers are delicious!).

See more healthy recipes

Top recipes

Print
clock clock iconcutlery cutlery iconflag flag iconfolder folder iconinstagram instagram iconpinterest pinterest iconfacebook facebook iconprint print iconsquares squares iconheart heart iconheart solid heart solid icon
cheese tortellini in garlic basil sauce

cheese tortellini in garlic basil sauce


  • Author: Lee Hersh
  • Total Time: 15 minutes
Print Recipe
Save Recipe Recipe Saved

Description

Whip up this easy and delicious Cheese Tortellini in garlic butter sauce in 15 minutes or less, perfect as a hot party appetizer or comforting weeknight meal (double the batch, it’ll disappear fast!), using refrigerated or frozen cheese tortellini for ultimate convenience.


Ingredients

Scale
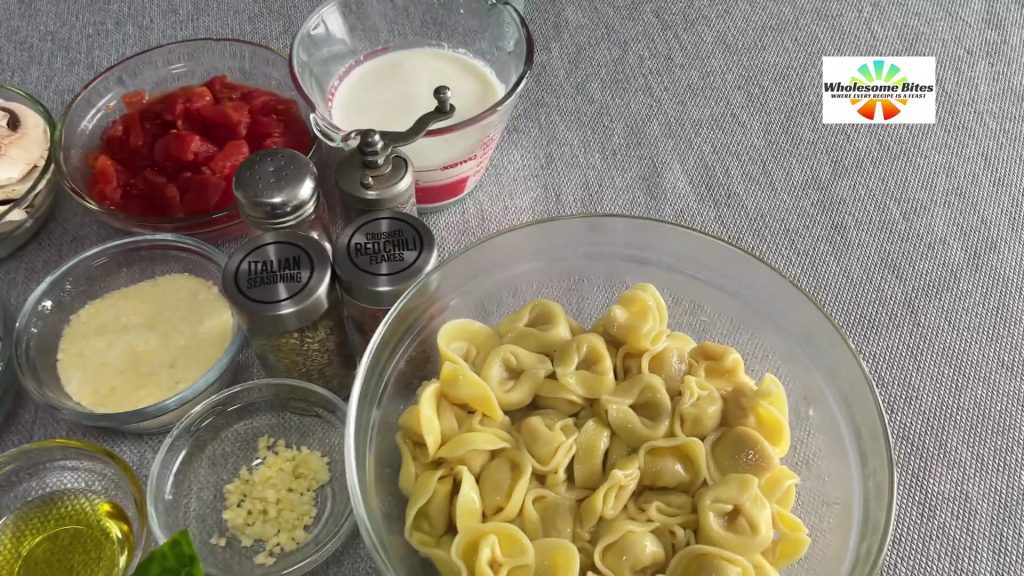
  • 32 ounces chicken broth or vegetable broth, divided
  • 2 tablespoons cornstarch
  • 1 (16 ounce) package frozen cheese tortellini (see notes)
  • 4 tablespoons butter
  • 2 cloves garlic minced
  • 2 teaspoons dried basil
  • 1/4 cup Parmesan cheese for garnish
  • Fresh basil for garnish, optional

Instructions

  1. In a large pot, bring 2 1/2 cups broth to a boil, add cheese tortellini, and cook until they float to the top of the water, about 3 minutes, ensuring the internal temperature of a tortellini reaches 165ºF. Drain completely.
  2. Meanwhile, whisk together the remaining 1 1/2 cups broth with cornstarch; in a large non-stick skillet, melt butter over medium-high heat until foaming, then stir in garlic and basil and cook for 2 minutes.
  3. Add the broth-cornstarch mixture to the skillet, bring to a boil, and simmer until thickened, about 2 minutes longer; then, add the cooked tortellini and toss to coat.
  4. Pour the mixture into a serving dish and garnish with Parmesan cheese and parsley, if desired. (We can remove “if desired” from the second sentence and put it at the end for smoother flow).

Notes

  1. For a vegetarian twist, simply substitute vegetable broth for the chicken broth.
  2. Refrigerated tortellini cook faster; they’ll float in 2 to 3 minutes. Dried tortellini will take longer; follow the package instructions (usually around 10 to 11 minutes).
  3. This recipe yields 8 servings (2 ounces and 275 calories per serving) as an appetizer or first course; keep warm in a slow cooker for a buffet-style serving.
  • Cook Time: 15 minutes
  • Category: Appetizer, Main Course, Side Dish
  • Cuisine: American, Italian

Nutrition

  • Serving Size: 4 servings
  • Calories: 551 kcal

Keywords: italian, pasta, tortellini

Did you make this recipe?

Share a photo and tag us — we can’t wait to see what you’ve made!

Filed Under: Recipe Tagged With: cheese tortellini in garlic basil sauce

cowboy caviar

May 9, 2024 by Lee Hersh Leave a Comment

cowboy caviar recipe

Whip up a big bowl of this fun, colorful, and endlessly adaptable Cowboy Caviar for your next barbecue or potluck – packed with healthy black-eyed peas, vegetables, and beans for good luck any time of year!

Craving more dips for your Chipotle chicken, grilled tri-tip, or pork chops? Look no further than my black bean salsa or Chipotle copycat guacamole!

This recipe is the classic sweet-tart version, but I’ve also included some delicious low-sugar suggestions for a more savory twist.

Since everyone has their own sweet tooth, I designed this recipe to be customizable – adjust the sugar to create a dish you’ll love so much, you’ll make it again and again! (P.S. The comments reveal some find it perfect as is, while others prefer it less sweet.)

Need to feed a crowd? Just click and slide the number next to ‘servings’ on the recipe card below to adjust the ingredients for your hungry guests – no math required!

What is cowboy caviar?

A delicious chameleon in the culinary world, cowboy caviar (or Texas caviar) can be enjoyed as a dip, salad topping, relish, side dish – anything you can imagine! It’s a staple at Texas barbecues and a fantastic way to boost your veggie and bean intake.

Can you make Cowboy Caviar recipe with less sugar?

This salad dressing leans sweet, a true Midwestern tradition that many adore (myself included, though I confess it!).

Don’t shy away from cowboy caviar if you’re watching sugar! Here are a few delicious ways to make it lower in sugar without sacrificing flavor.

  • Add 1 tablespoon of sugar at a time, blending well between additions and tasting, until desired sweetness is achieved.
  • Add a tablespoon of sugar and a quarter cup of lime juice to the salad.
  • Add 3 tablespoons lemon juice and 1 tablespoon maple syrup to the salad.
  • Add 1 tablespoon honey and a dash of tequila to the salad.
cowboy caviar

Is Cowboy Caviar vegan?

Yes, it is, as long as you don’t make it with honey.

Is Cowboy Caviar gluten free?

Made entirely with beans and veggies, this gluten-free cowboy caviar pairs perfectly with corn tortilla chips for dipping!

Can you make Cowboy Caviar ahead of time?

While some fresh veggies may soften slightly in the dressing after a day, feel free to pre-dress the beans in cowboy caviar for hassle-free make-ahead!

Overnight chilling is definitely safe, and you can store leftover cowboy caviar in the fridge for 3-4 days with no worries!

Can you make Cowboy Caviar recipe without cilantro?

Can’t stomach cilantro? No problem! Skip it and sub in parsley, chopped scallions, or minced chives for a delicious twist.

What kind of vinegar works best with Cowboy Caviar?

Feel free to swap the red wine vinegar for apple cider vinegar or even plain white vinegar in a pinch – this recipe is a guaranteed crowd-pleaser regardless!

cowboy caviar

Can you use Italian dressing in Cowboy Caviar?

For an Italian dressing twist, skip the olive oil, sugar, vinegar, chili powder, and salt; start with 1 cup of your favorite dressing, then adjust to taste.

How long can you keep Cowboy Caviar?

This recipe keeps about 3-4 days in the refrigerator.

Can you freeze Cowboy Caviar?

Skip the freezer, but enjoy leftover cowboy caviar on everything from scrambled eggs and green salads to a flavorful steak topper!

Do you use canned or dried beans in Cowboy Caviar?

Canned black-eyed peas and beans are super convenient (fresh, cooked options might also be in the produce section) – go for whichever fits your schedule!

For a lower-sodium option or larger batches, dried beans are a perfectly healthy alternative in cowboy caviar!

Can you make Cowboy Caviar that’s low in sodium?

For a low-sodium twist, opt for low-sodium canned beans or whip up some dried beans at home!

Using dried beans to make Cowboy Caviar:

While the package directions will provide specific cook times (usually boiling for an hour or half that in a pressure cooker), 1/2 to 3/4 cup of dried beans equals one 15-ounce can for this recipe.

What kind of corn do you use in Cowboy Caviar recipe?

The recipe calls for extra sweet corn (also labeled super sweet or shoepeg corn) from an 11-ounce can, a slightly smaller size than typical canned corn.

For the corn, the recipe recommends extra sweet (super sweet, shoepeg) from an 11-ounce can, but you can substitute with regular canned sweet corn, thawed frozen corn, or fresh corn for a natural sweetness, depending on your preference and availability.

See more healthy recipes

Print
clock clock iconcutlery cutlery iconflag flag iconfolder folder iconinstagram instagram iconpinterest pinterest iconfacebook facebook iconprint print iconsquares squares iconheart heart iconheart solid heart solid icon
cowboy caviar


  • Author: Lee Hersh
  • Total Time: 20 minutes
Print Recipe
Save Recipe Recipe Saved

Description

Whip up a big bowl of this fun, colorful, and endlessly adaptable Cowboy Caviar for your next barbecue or potluck – packed with healthy black-eyed peas, vegetables, and beans for good luck any time of year!


Ingredients

Scale
  • 1/2 cup olive oil
  • 1/4 cup sugar or to taste, see notes
  • 1/4 cup white wine vinegar
  • 1 teaspoon chili powder
  • 1 teaspoon Salt
  • 1 pound Roma tomatoes seeded and diced
  • 1 (15 ounce) can black-eyed peas drained and rinsed
  • 1 (15 ounce) can black beans drained and rinsed
  • 1 (11 ounce) can super sweet corn, drained (see notes)
  • 1 red onion diced
  • 1/2 cup diced green bell pepper
  • 1/2 cup diced red bell pepper
  • 1 cup chopped cilantro or parsley, from 1 bunch

Instructions

  • In a large bowl, whisk together the olive oil, sugar, white wine vinegar, chili powder, and salt. 
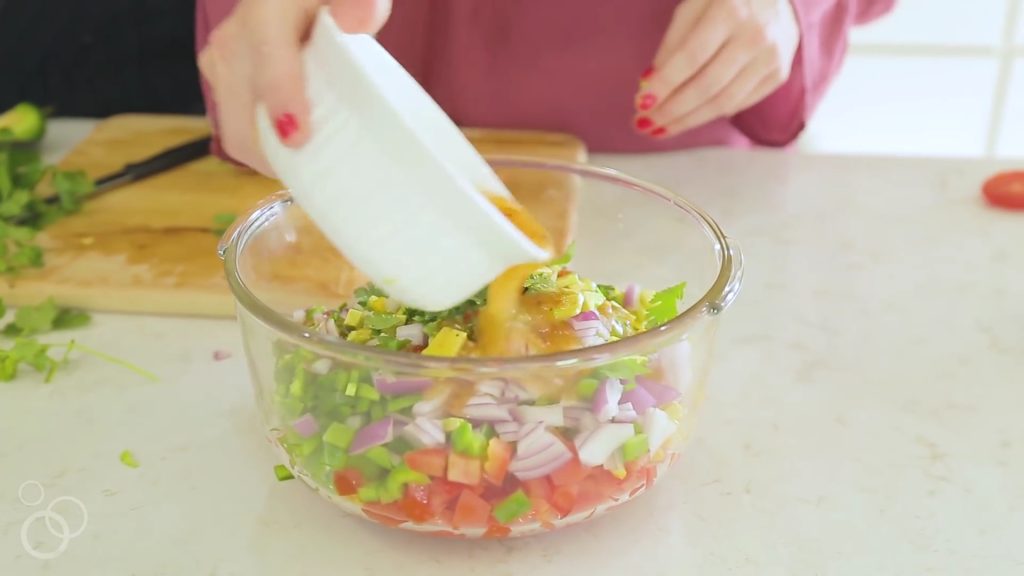
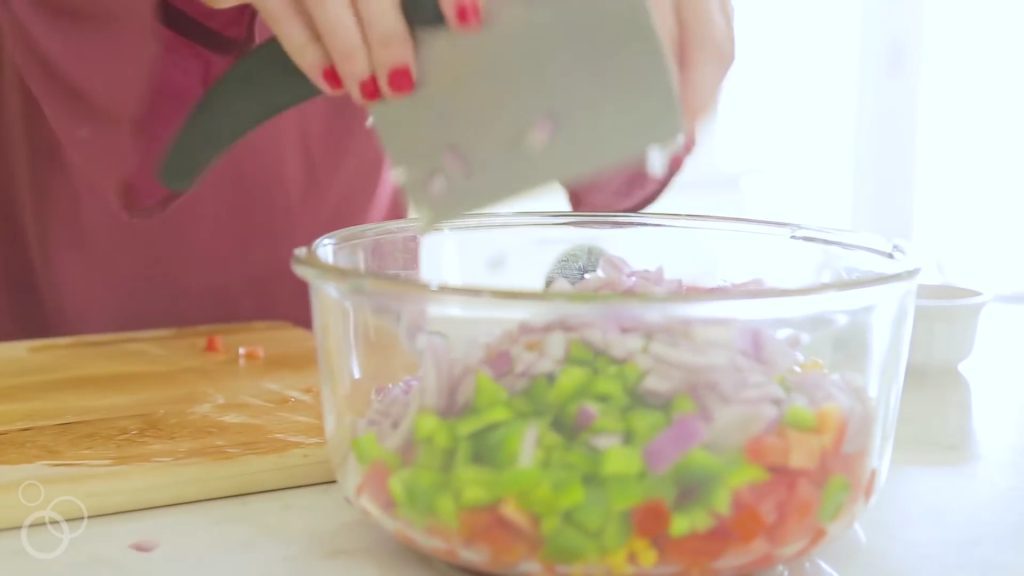
  • Add tomatoes, black-eyed peas, beans, corn, red onion, and bell peppers. Stir to combine.
  • Stir in cilantro. Cover and chill until serving time.

Notes

  1. Regular canned sweet corn or frozen corn (about 3/4 cup, or the whole 15-ounce can) can be substituted for the extra sweet corn.
  2. For a milder onion flavor, substitute a bunch of green onions for the red onion, or use one sweet onion.
  3. Instead of using 1/2 cup each of chopped red and green bell peppers, you can substitute a single bell pepper.
  4. While Midwest folks (including myself!) love the sweetness in this recipe (it’s a Wisconsin thing!), feel free to adjust the sugar to your taste. If 1/4 cup sounds like too much, start with 1 tablespoon and add more to taste. A couple of readers found it too sweet, and that breaks my heart! But hey, you can always add more vinegar and salt to try to salvage it. This is just how we love it in America’s Dairyland.
  • Prep Time: 15 minutes
  • Cook Time: 5 minutes
  • Category: Appetizer, salad
  • Cuisine: American

Nutrition

  • Serving Size: 13 servings
  • Calories: 194 kcal
  • Sugar: 8g
  • Fat: 9.8g
  • Carbohydrates: 23.3g
  • Protein: 5.1g

Keywords: beans,corn, pappers

Did you make this recipe?

Share a photo and tag us — we can’t wait to see what you’ve made!

Filed Under: Recipe Tagged With: cowboy caviar

Chipotle Chicken recipe

May 8, 2024 by Lee Hersh Leave a Comment

Chipotle Chicken recipe

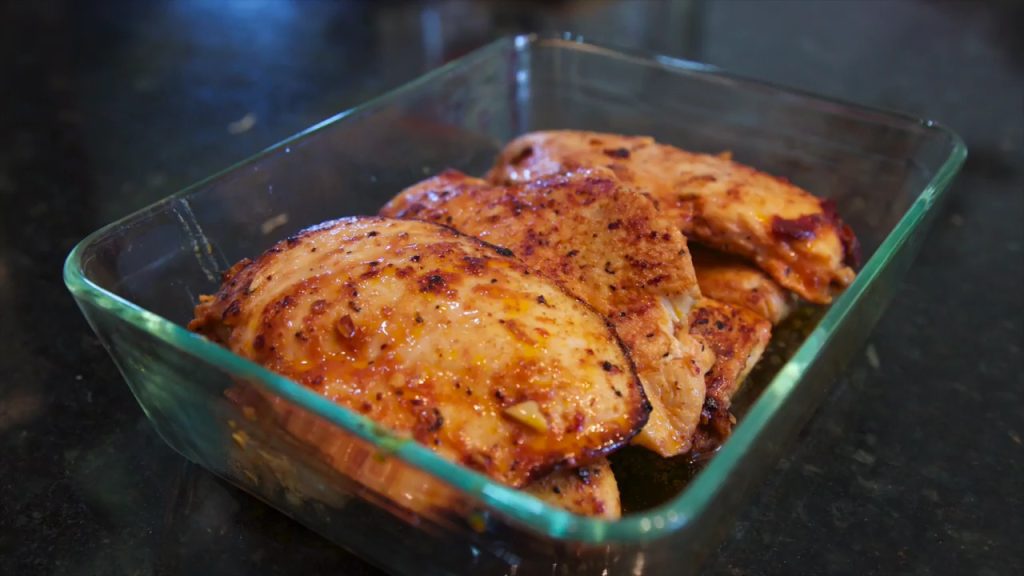
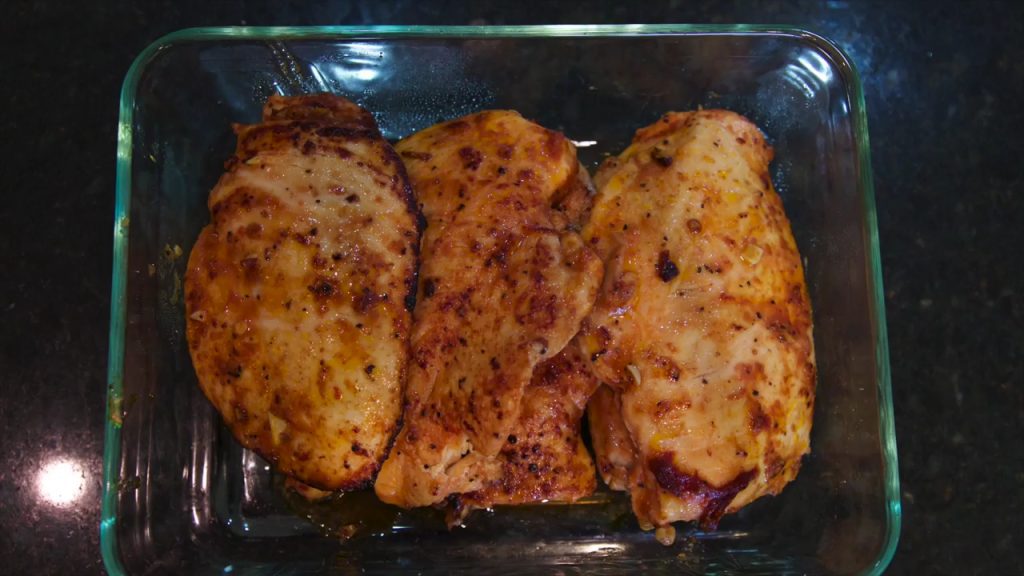
Ditch the takeout line and whip up this copycat Chipotle Chicken at home – the marinade is a breeze, healthy, and delivers flavors that surpass the original! Use chicken breasts or thighs, and follow my guide for baking or grilling perfection.

Take your Chipotle menu to the next level with my cilantro-lime rice, guacamole, fajita veggies, and corn salsa, plus steak and sofritas for even more delicious choices for your friends and family!

Chipotle Chicken recipe

When I’m craving fresh food in a hurry, Chipotle Mexican Grill’s chicken is my go-to – nothing beats a giant burrito or bowl overflowing with rice, beans, veggies, creamy guacamole, and the star of the show, their delicious chicken.

Chipotle’s flavorful, tender, and juicy chicken is the star of my order, perfect for everything from tacos to bowls, and I’ve got cooking methods covered whether you want to grill, sauté, or bake it at home!

Making Chipotle Chicken for a crowd? No sweat! Just use the handy slider in my recipe card to easily scale up the quantity.

How to Make Chipotle Chicken Marinade

The smoky, spicy flavor in Chipotle’s chicken is delivered by a combination of dried ancho chiles and adobo sauce.

To create this flavor, you can:

  1. Consider buying Ancho Chile powder online. (Culinary Hill may earn money if you buy through this link)
  2. Make your own Ancho Chile powder
  3. Soak Dried ancho chiles (Culinary Hill may earn money if you buy through this link)

Marinade Method 1: Using Ancho Chile Powder

Ancho Chile Pepper powder is available for purchase, or you can make your own: 1/4 cup of the powder is equivalent to 2 oz. of the peppers (stems and seeds removed, ground up).

Marinade Method 2: Soaking Dried Ancho Chiles

  • While slow-soaking dried ancho chiles for at least 12 hours softens them up for easy prepping – removing the stems, seeds (use gloves!), and splitting them open – for an extra kick, you can add chipotle pepper seeds.
  • A huge thank you to reader Ryan for sharing their quick-soaking method – it’s a lifesaver that cuts 12 hours off this recipe! Simply toast the dried chiles in a skillet, then microwave them in water for perfectly softened chiles in minutes.

While Chipotle skips red onion in their marinade, it adds a delicious depth that’s hard to resist. So, here’s the dilemma: prioritize authenticity or pure flavor? Spoiler alert: I went with the tastier option (and included the red onion).

Combine all the marinade ingredients in a food processor or blender.

How to Cook Chipotle Chicken

Chipotle grills their boneless, skinless chicken thighs on a flat-top grill, a method familiar to anyone who’s enjoyed their smoky, flavorful chicken in a burrito or bowl.

Here are your cooking options at home:

  1. Stove-top skillet (indoor, similar to Chipotle’s method)
  2. Gas grill (outdoor, minimal cleanup)
  3. Baked in the oven (cover with parchment paper for juicy chicken every time)
Chipotle Chicken recipe

While I recommend a final temperature of 165 degrees for safe cooking, culinary school teaches us to pull chicken at 160 degrees and let it rest, as it’ll continue to cook internally (carry-over cooking) and reach a safe 165 degrees or so.

See more healthy recipes and

Print
clock clock iconcutlery cutlery iconflag flag iconfolder folder iconinstagram instagram iconpinterest pinterest iconfacebook facebook iconprint print iconsquares squares iconheart heart iconheart solid heart solid icon
Chipotle Chicken recipe

Chipotle Chicken recipe (copycat)


  • Author: Lee Hersh
  • Total Time: 1 hour 20 minutes
Print Recipe
Save Recipe Recipe Saved

Description

Ditch the takeout line and whip up this copycat Chipotle Chicken at home – the marinade is a breeze, healthy, and delivers flavors that surpass the original! Use chicken breasts or thighs, and follow my guide for baking or grilling perfection.


Ingredients

Scale
  • 1/2 medium red onion coarsely chopped (see notes)
  • 3 cloves garlic
  • 2 tablespoons adobo sauce from a small can of Chipotle peppers
  • 2 tablespoons ancho chile powder or 1 ounce dried ancho chiles, soaked, see recipe notes
  • 2 tablespoons olive oil or rice bran oil, plus more for the cooking surface
  • 2 teaspoons cumin
  • 2 teaspoons dried oregano (see notes)
  • Salt and freshly ground black pepper
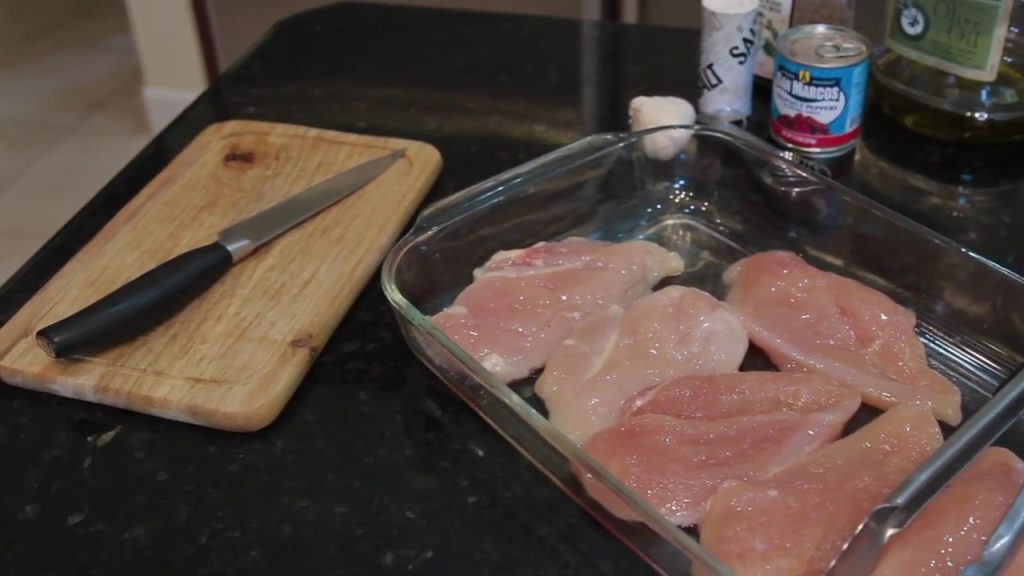
  • 4 pounds boneless, skinless chicken

Instructions

To make the marinade (see recipe notes for dried chiles method):

  1. Combine the fiery flavors of red onion, garlic, adobo sauce, and ancho chile powder with olive oil, cumin, and oregano in your food processor. Blend until smooth, then thin to 1 cup with water for a marinade ready to burst with bold taste. 
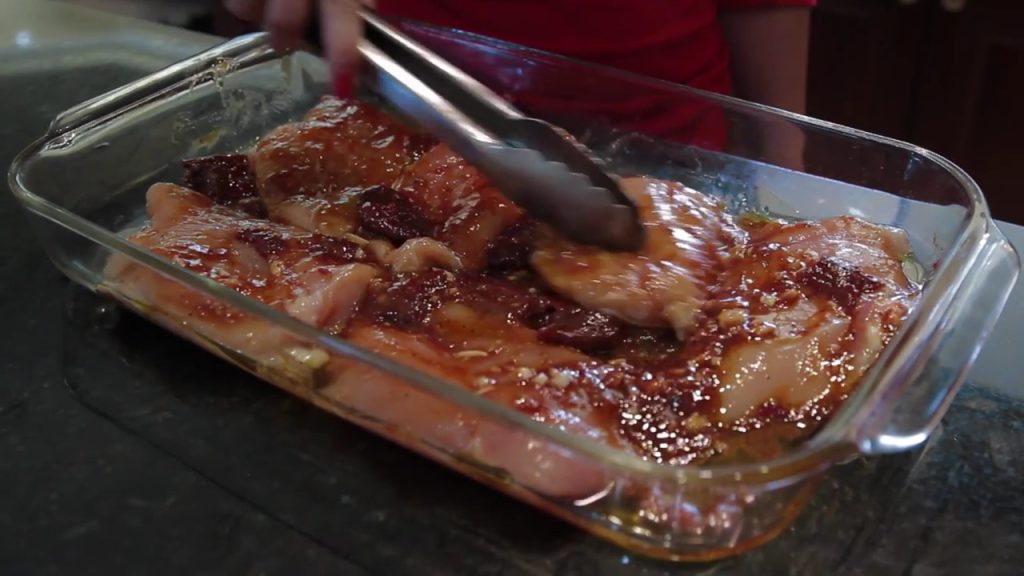
  2. Place the chicken in a large, freezer-safe plastic bag, then pour in marinade, seal the bag, and mash it gently until the chicken is evenly coated. Marinate in the refrigerator in a dish for at least 30 minutes, or overnight for deeper flavor. 

To make the chicken on the stove:

  1. Heat 2 tablespoons oil in a large skillet until shimmering, then add chicken and cook, turning occasionally, in batches if your skillet is small, until the temperature reaches 165 degrees on an internal thermometer.To accommodate different skillet sizes, cook the chicken in batches. 
  2. After transferring to a cutting board and tenting with foil for 10 minutes to trap steam, chop the food into small pieces, season with salt to taste, and serve on tortillas or in bowls with your desired toppings.

To make the chicken on the grill:

  1. Preheat a pan or skillet over medium-high heat and coat it with 2 tablespoons of oil.Grill the chicken in batches, turning occasionally for 10 to 15 minutes, until an internal thermometer registers 165°F and bits of caramelized fond cling to the outside. Add 1 – 2 tablespoons of oil to your grilling surface between batches.
  2. Remove to a cutting board, tent with foil for 10 minutes, then chop into small pieces, season to taste with salt, and serve on tortillas or in bowls with additional toppings as desired.

To bake the chicken in the oven (preferred method for white meat):

  1. To get the chicken cooking, preheat your oven to 400 degrees and coat a baking dish with oil or nonstick spray, then arrange the chicken pieces in a single layer.Completely cover the chicken with parchment paper, tucking it in around the edges, and bake for 30 to 40 minutes, or until the chicken reaches an internal temperature of 165°F when tested with an internal thermometer.
  2. Remove to a cutting board, tent with foil for 10 minutes, then chop into small pieces, season to taste with salt, and serve on tortillas or in bowls with additional toppings as desired.

Notes

  1. For the quick-soaking method with ancho chiles, start by removing the stems and seeds while wearing gloves (recommended), then toast the dried chiles in a dry skillet over medium-low heat until fragrant, about 5 minutes, avoiding burning.Transfer to a medium bowl, add 4 cups (1 quart) water and 2 Tablespoons adobo sauce, and microwave on HIGH for 6 minutes.Drain the chipotle peppers, reserving ¼ cup of the cooking liquid to rinse some of the adobo sauce off in the food processor for step 2.
  2. For the slow-soaking method, place ancho chiles in a bowl, add enough water to cover completely, then top with a small plate or bowl to weigh them down and ensure they are fully submerged. Soak for at least 12 hours or overnight, and drain well afterwards. 

While Italian and Mexican oregano offer distinct flavors (Mexican has a touch of marjoram), either works beautifully in this recipe – use whichever you have on hand!

  • Prep Time: 20 minutes
  • Cook Time: 1 hours
  • Category: Main course
  • Cuisine: American, Mexican

Nutrition

  • Serving Size: 8 servings
  • Calories: 133 kcal
  • Sodium: 363mg
  • Fat: 6.7g
  • Carbohydrates: 1.8g
  • Protein: 15g
  • Cholesterol: 70mg

Did you make this recipe?

Share a photo and tag us — we can’t wait to see what you’ve made!

Filed Under: Recipe Tagged With: Chipotle Chicken recipe

CHIPOTLE CILANTRO LIME RICE (COPYCAT)

May 8, 2024 by Lee Hersh Leave a Comment

CHIPOTLE CILANTRO LIME RICE

Unleash the secrets to Chipotle’s Cilantro Lime Rice at home, starting with the perfect rice and a surprising cooking method (plus alternative techniques for long-grain rice and even your trusty rice cooker!). Scroll down for a video to see just how easy this delicious rice is to make!

Sometimes in life, it’s the simplest things that are the best.

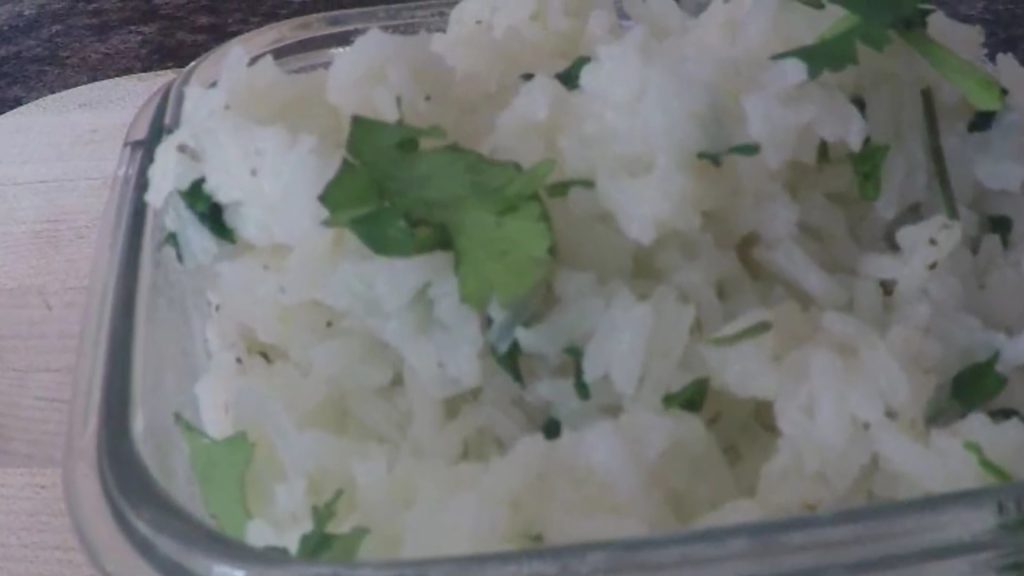
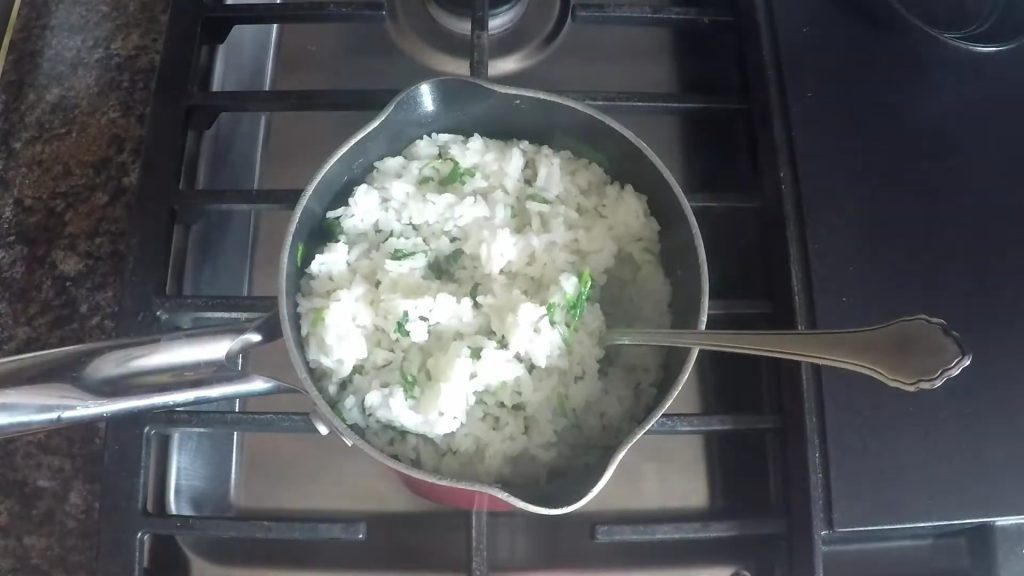
Craving the ultimate comfort? Chipotle’s Cilantro Lime Rice delivers: soft and fluffy with a satisfying chew, and blissfully free of any stickiness.

A chameleon on the menu, Chipotle’s Cilantro Lime Rice complements burritos and salads alike, but what makes it so perfect?

CHIPOTLE CILANTRO LIME RICE (COPYCAT)

While I’ve honed my rice-cooking skills over the years, transforming it from crunchy and bland to perfectly seasoned and soft (cilantro lime or otherwise!), I’ve yet to conquer the pesky problem of stickiness, despite trying all sorts of rice varieties, from Jasmine to short-grain.

See latest video.

While Chipotle uses long-grain rice, I found Basmati best replicated their texture, but I’ve also experimented with other rice varieties and cooking methods, which I’ve detailed here.

HOW MANY CUPS RICE WILL 1 CUP UNCOOKED RICE MAKE?

  • One cup of uncooked white rice yields three cups of cooked white rice.
  • While 1 cup uncooked brown rice might seem like a small amount, it expands to yield 4 cups of cooked brown rice.

METHOD 1: BASMATI RICE, STOVE-TOP METHOD (PREFERRED)

Having tried Basmati before, I cooked it this time using the typical method for long-grain rice.

While some recommend soaking rice for 30 minutes beforehand or rinsing it repeatedly until the water runs clear, I’ve found the key to be simply measuring a specific rice-to-water ratio, bringing it to a boil, covering it, and waiting for all the water to be absorbed.

CHIPOTLE CILANTRO LIME RICE (COPYCAT)

For the perfect Basmati rice, achieve a fluffy texture by using at least 4 cups of water for every cup of rice and leaving it uncovered while boiling. I’ve also updated this recipe to include a bay leaf (game changer!), recommended by many of the commenters below.

After rinsing the drained rice in hot water, stir in lime and lemon juices, salt, and finely chopped cilantro while it’s still warm – perfection!

METHOD 2: LONG-GRAIN RICE, STOVE-TOP METHOD

While Chipotle likely skips the rinsing step, to achieve their fluffy rice texture, start with long-grain rice like they do, and rinse yours to remove excess starch for perfectly separate grains.

You could also add a teaspoon of olive oil to the pot (Chipotle uses rice bran oil, but olive oil works well too), and don’t forget to add a bay leaf! Stir in citrus juice, salt, and cilantro when the rice is tender.

METHOD 3: LONG-GRAIN RICE, RICE-COOKER METHOD

I love my rice cooker! It delivers results as good as the stovetop, but with way less hassle (rinsing the rice first, as my manual suggests and experience confirms, definitely helps achieve fluffier results).

Add a teaspoon of oil and some salt if desired, along with a bay leaf (because honestly, I’m sold on bay leaves for white rice – from now on, it’s going in every pot no matter the rice or dish!).

While your rice cooker manual will have the exact proportions, I typically use around 3/4 cup rice to 1 cup water (there’s a special “rice” measuring cup that comes with some rice cookers that holds 3/4 cup). Then, I toss the cooked rice with salt, citrus juice, and cilantro at the end.

Method 4: CHIPOTLE CILANTRO LIME BROWN RICE

Craving Chipotle’s brown rice? Whip up Cilantro Lime Brown Rice in your rice cooker or on the stovetop using brown basmati or long-grain rice, following the revised cooking times in Step 7. (Just like the recipe notes, this yields 16 ½-cup servings, compared to 12 servings of white rice.)

CHIPOTLE CILANTRO LIME RICE (COPYCAT)

This isn’t fancy (size-wise either!), but my trusty $30 rice cooker from Amazon (with over 3,500 positive reviews – that’s a lot of rice!) gets the job done, and apparently my sisters Erin and Meredith agree – they have the same one!

Chipotle secret menu tip (warning: you might already know this!): Cilantro haters rejoice, you can ask for rice without cilantro at Chipotle – they keep a stash for those who know to ask. And hey, you can easily make cilantro-free rice at home too!

See more healthy recipes

Top recipes

Print
clock clock iconcutlery cutlery iconflag flag iconfolder folder iconinstagram instagram iconpinterest pinterest iconfacebook facebook iconprint print iconsquares squares iconheart heart iconheart solid heart solid icon
CHIPOTLE CILANTRO LIME RICE (COPYCAT)

CHIPOTLE CILANTRO LIME RICE (COPYCAT)


  • Author: Lee Hersh
  • Total Time: 25 minutes
Print Recipe
Save Recipe Recipe Saved

Description

Unleash the secrets to Chipotle’s Cilantro Lime Rice at home, where the journey begins with the perfect rice cooked using a surprising method.


Ingredients

Scale
  • 2 cups basmati rice unrinsed, or long-grain white rice, rinsed (see notes)
  • 2 1/4 teaspoons salt, divided
  • 1 bay leaf
  • teaspoon olive oil or rice bran oil, optional
  • 2 tablespoons finely chopped cilantro
  • 2 tablespoons fresh lime juice
  • 2 tablespoons fresh lemon juice

Instructions

To cook basmati rice on the stove top:

  1. In a large pot, bring 8 cups of water to a boil. Then, add the rice, 2 teaspoons of salt, and the bay leaf. Stir everything together, return to a boil, and boil uncovered for 12 minutes.
  2. After removing the bay leaf, drain and rinse the rice with hot water using a fine mesh strainer, then pour it into a large bowl.
  3. Stir in cilantro, lime juice, and lemon juice, then season with the remaining quarter teaspoon of salt, or more to taste. Serve hot or at room temperature.

To cook long-grain rice on the stove top: 

  1. In a large pot, bring 4 cups of water to a boil, then add rice, 2 teaspoons of salt, a bay leaf, and oil (if using), reduce heat to low, cover, and cook for 15 minutes.
  2. After removing the bay leaf, stir in cilantro, lime juice, and lemon juice. Then, add the remaining ¼ teaspoon of salt, or more to taste. Serve hot or at room temperature.

To cook long-grain rice in a rice-cooker: 

  1. Combine the rinsed rice, water (following the manufacturer’s instructions, see notes), a reduced amount of salt (1 teaspoon), bay leaf, and optional oil in the rice cooker, then close it, plug it in, turn it on, and cook according to the manufacturer’s instructions. 
  2. After removing the bay leaf from the cooked rice, stir in cilantro, lime juice, and lemon juice. Season with additional salt to taste (about 1/4 teaspoon is recommended), and serve hot or at room temperature.

To cook brown rice: 

Follow the instructions above using the following times: 40 minutes for Basmati on the stovetop, 45 minutes for long-grain on the stovetop, and 60-70 minutes for a rice cooker (or according to manufacturer’s instructions). This recipe yields 18 servings of 1/2 cup each.

Notes

For long-grain rice, rinsing before cooking is recommended to remove excess starch. To do this, place it in a fine-mesh sieve under cool running water until the water runs clear, then drain well before adding it to the pot or rice cooker. Alternatively, soak the rice in a large bowl of water for up to 30 minutes, a more water-conserving method that also helps remove starch.

While using a rice cooker, follow the manufacturer’s instructions for rice and water portions, as their measuring cup might differ from a standard 8-ounce cup. They will also specify the ideal water amount for best results. Use those instructions over mine, but feel free to adjust the other ingredients to your taste.

  • Prep Time: 5 minutes
  • Cook Time: 20 minutes
  • Category: Side dish
  • Cuisine: Mexican

Nutrition

  • Serving Size: 12 servings
  • Calories: 117 kcal
  • Sugar: 0.1g
  • Sodium: 437.9g
  • Fat: 0.6g
  • Carbohydrates: 25g
  • Protein: 2.2g
  • Cholesterol: 0g

Did you make this recipe?

Share a photo and tag us — we can’t wait to see what you’ve made!

Filed Under: Recipe Tagged With: CHIPOTLE CILANTRO LIME RICE

  • « Previous Page
  • 1
  • 2
  • 3
  • 4
  • …
  • 16
  • Next Page »
  • Facebook
  • GitHub
  • Instagram
  • Pinterest
  • Twitter
  • YouTube

Breakfast

Chicken Fajita Breakfast Bake

Chicken Fajita Breakfast Bake

Peanut Butter Banana Oatmeal Bake

Peanut Butter Banana Oatmeal Bake

Easy Banana Protein Mug Cake

Easy Banana Protein Mug Cake

See More;

[

Privacy Policy